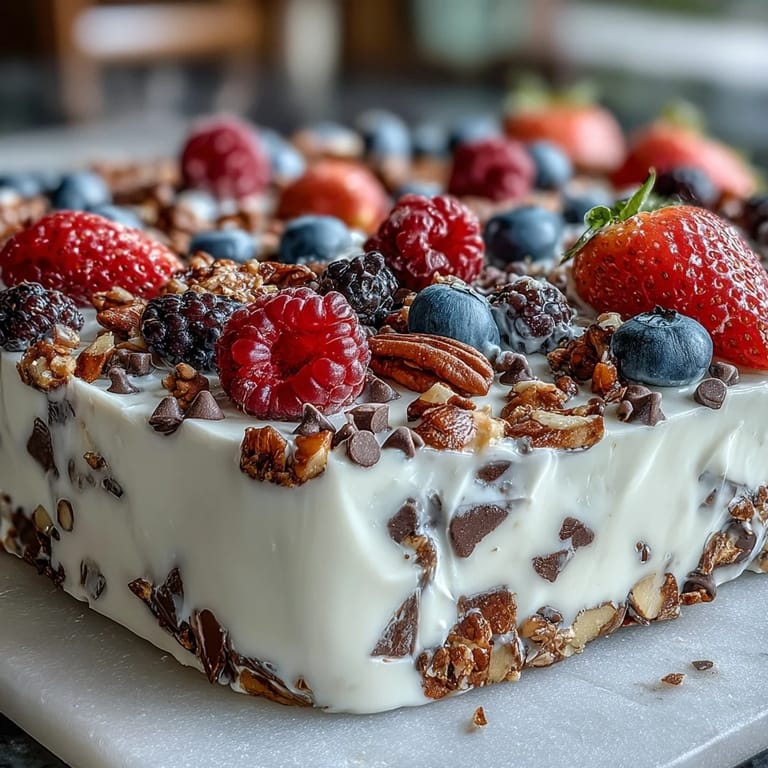
 Save to Pinterest
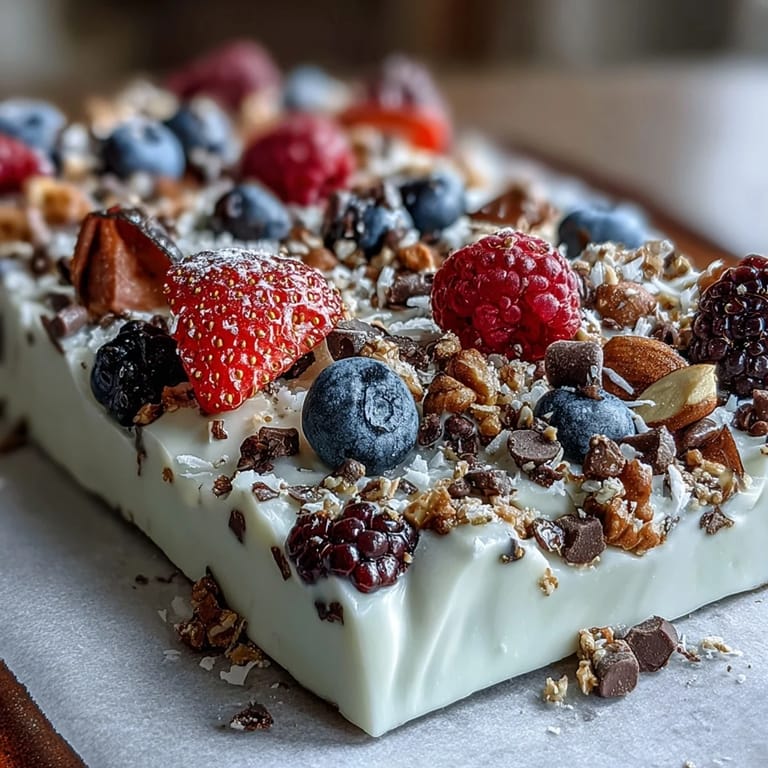
 The first time I made frozen yogurt bark, I wasn’t hunting for a recipe—I just wanted something cold after a too-hot afternoon. The real magic happened as I layered vibrant berries and crunchy granola over the velvety yogurt—it felt a little like painting dessert. My kitchen was filled with the sweet scent of summer fruit and the faint hum of the freezer kicking on. There's something so satisfying in the simple act of scattering toppings, each piece a tiny masterpiece. Every batch since then has felt like a playful experiment, with flavors changing depending on what's in the fridge.
Last weekend, my nephew helped me sprinkle berries across the yogurt, and he insisted on making a cluster just for himself. We ended up laughing when he pressed the toppings so hard they stuck to his fingers instead of the yogurt. The best part was the anticipation—checking the freezer every half hour with squeals of excitement. That batch disappeared in an afternoon, with sticky smiles and tiny chocolate chips lost on the floor. I’m convinced the joy multiplies when you share this snack with someone else.
Ingredients
- Plain Greek Yogurt: Use full-fat for a richer taste or low-fat for a lighter treat, and always stir the honey in thoroughly for a smooth base.
- Honey or Maple Syrup: Adjust to taste and swirl gently to balance tart yogurt with sweet undertones—I sometimes sneak in extra for a golden sheen.
- Mixed Fresh Berries: Slice larger berries for even coverage, and pat them dry so the bark stays crisp and doesn't get icy.
- Granola: Use crunchy clusters for maximum texture—gluten-free works perfectly if needed.
- Mini Chocolate Chips (optional): Sprinkling just a handful adds pockets of melty sweetness when you bite in.
- Unsweetened Shredded Coconut (optional): Scatter for extra flavor and some tropical flair—don't overdo it or it can dominate.
Tired of Takeout? 🥡
Get 10 meals you can make faster than delivery arrives. Seriously.
One email. No spam. Unsubscribe anytime.
Instructions
- Prep Your Pan:
- Line a 9x13 inch rimmed baking sheet with parchment paper, pressing it flat so the yogurt won't slip or curl.
- Mix Yogurt Base:
- In a mixing bowl, stir together Greek yogurt and honey (or maple syrup) until glossy and smooth—watch for ribbons as the sweetener blends in.
- Spread and Shape:
- Using a spatula, spread the yogurt mixture onto the sheet about ½ inch thick, shaping the edges for neat lines or leaving them rustic.
- Add Berry Color:
- Scatter berries evenly across the yogurt layer, dotting every corner so each bite pops with fruit.
- Top with Crunch:
- Sprinkle granola, chocolate chips, and coconut over everything, aiming for balance and a little of everything in each section.
- Press and Set:
- Gently press toppings into the yogurt so they stick—I use my palms but you can use the spatula to avoid sticky fingers.
- Freeze Firm:
- Place the pan in the freezer and leave undisturbed for at least 2 hours—the surface should be completely solid before breaking.
- Break and Serve:
- Lift the bark out using the parchment, crack into pieces, and enjoy immediately—store leftovers in a sealed container in the freezer.
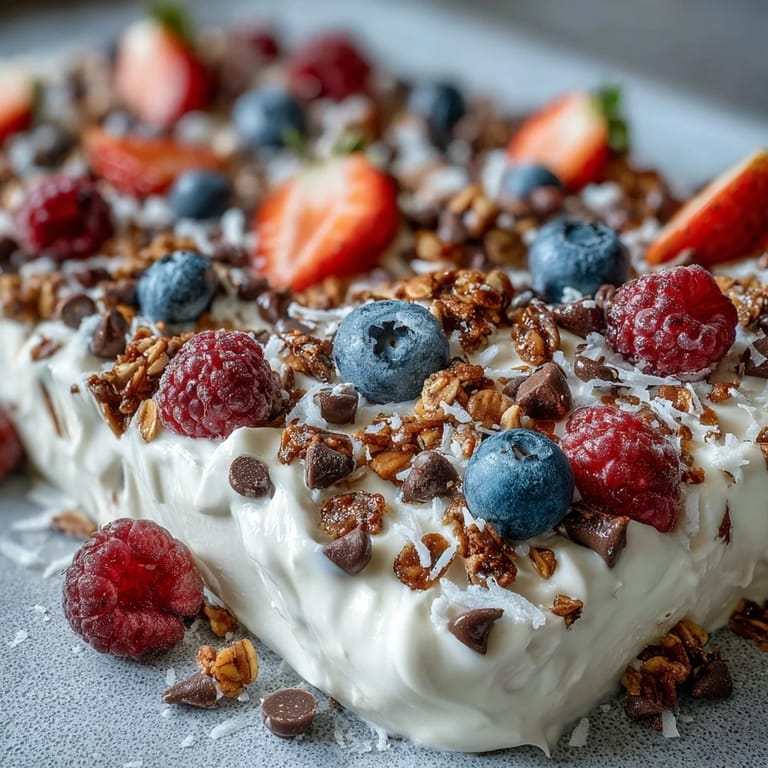
 Save to Pinterest
 It became more than a snack the afternoon my friend dropped by unexpectedly, and together we cracked the bark and chased bits of coconut across the counter. We ended up talking longer, letting the cold treat melt as conversation drifted from summer plans to favorite childhood flavors.
Making It Your Own
Every time I make this bark, I tweak the toppings—sometimes it's roasted nuts, sometimes seeds, depending on what's handy. Swapping maple syrup for honey changes the aroma and adds a caramel note that pairs well with peaches in the mix. Yogurt flavors are fair game, as long as you stick to thick styles so the bark sets firmly. Don't shy away from new fruit combinations—kiwi or mango work surprisingly well. Experimentation is half the fun, transforming leftovers into something colorful and cool.
How to Store and Serve
Once broken into pieces, I stash the bark in a container lined with parchment to prevent sticking. Serve the bark straight from the freezer, as it melts quickly and gets a little messy—perfect for eating outside in the sunshine. If storing overnight, always reseal tightly to keep the granola crunchy. Slices are best eaten within a week, or the berries lose their juiciness. Sharing right out of the freezer adds a touch of spontaneity to snack breaks.
Small Mistakes I Learned From
My first batch taught me that overloading the yogurt with too many berries makes it hard to break cleanly—balance matters. I also found skipping parchment paper makes removal nearly impossible, so don't skimp on lining. Every time I rush the freezing step, I regret it, because soft bark never cracks as wonderfully as when properly frozen.
- If pieces are stuck, let the pan sit out for a minute to loosen.
- Break the bark gently—sharp cracks can send toppings flying.
- Always have napkins handy, the bark is messy in the best way.
 Save to Pinterest
 This bark stays cool and lively even as the days get hotter—each piece feels like a summer break in your kitchen. Enjoy every bite, whether it's shared or snuck solo behind the fridge door.
Recipe Questions & Answers
- → Can I use regular yogurt instead of Greek yogurt?
Yes, but Greek yogurt provides a thicker texture. Regular yogurt may result in softer bark after freezing.
- → What fruits can I substitute for berries?
Try peaches, mango, kiwi, or sliced bananas for variety and added color. Use your favorite fruits.
- → How can I make this gluten-free?
Select certified gluten-free granola or omit it. Check all ingredients to avoid potential gluten sources.
- → How long does the bark last in the freezer?
Store in an airtight container for up to two months. Enjoy straight from the freezer for best texture.
- → What tools are required for preparation?
You’ll need a mixing bowl, spatula, rimmed baking sheet, parchment paper, and a knife for fruit slicing.
- → Can I make this vegan?
Use dairy-free yogurt and select plant-based sweeteners or toppings for a fully vegan option.