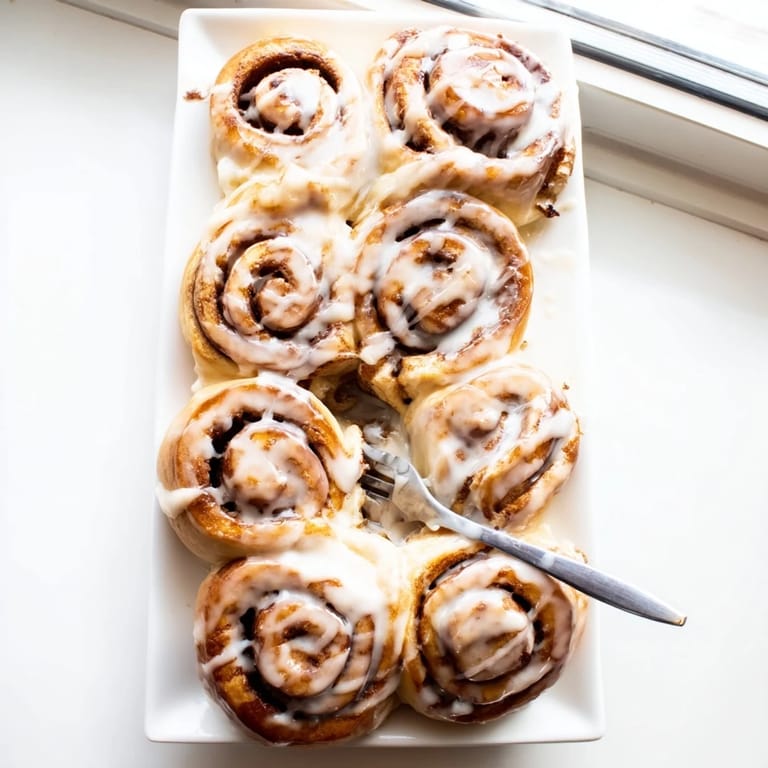
 Save to Pinterest
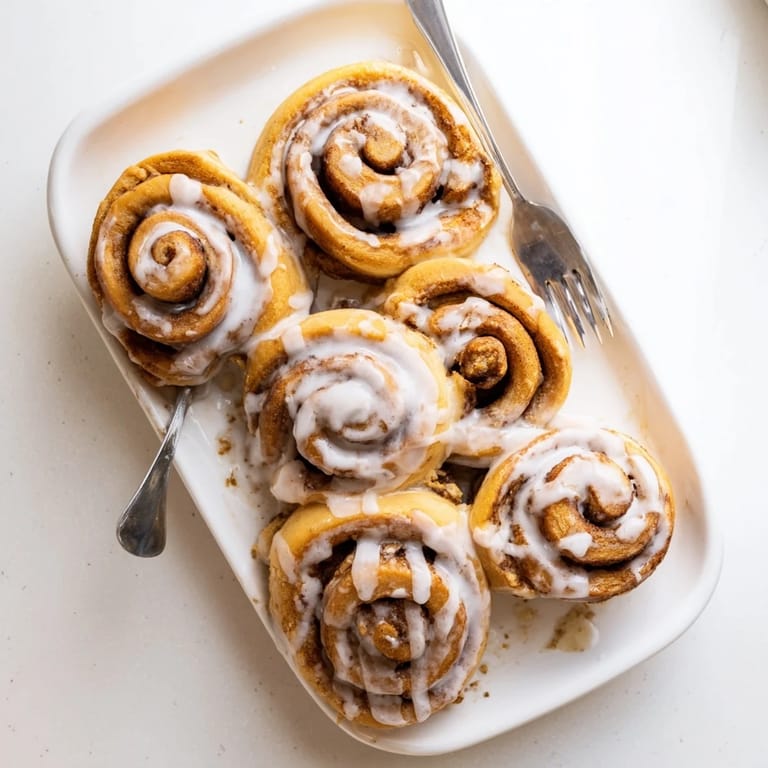
 My tiny apartment kitchen smelled like a bakery that morning, warm yeast filling every corner as snow fell outside the window. I'd been nervous about making yeast dough from scratch, convinced I'd somehow mess it up, but watching those little bubbles form in the milk mixture felt like magic happening right in my bowl. The first time I pulled these golden spirals from the oven, I actually did a happy dance in my socks, and I'm not even embarrassed to admit it.
I made these for my roommates during our first real snowstorm in Chicago, and we ended up eating them straight from the pan while watching movies all afternoon. Something about warm cinnamon rolls just makes people linger around the kitchen, stealing glances at the oven door and asking if they're ready yet.
Ingredients
- All purpose flour: This structure builder creates the pillowy texture we want, so measure carefully by spooning into your cup and leveling off
- Active dry yeast: The little worker that makes everything rise, and I promise it's more forgiving than you might think
- Whole milk: Lukewarm like a babys bath, this activates the yeast and adds richness to every bite
- Granulated sugar: Feeds the yeast and adds just enough sweetness to balance the filling
- Unsalted butter: Melted for the dough creates tenderness, while softened butter for the filling helps everything stay put
- Egg: Room temperature eggs incorporate better and give the dough structure and richness
- Salt: Dont skip this, it balances all that sweetness and makes the flavors pop
- Brown sugar: Packed tight creates that gooey caramel like texture in the filling that makes these so addictive
- Ground cinnamon: The star of the show, so use fresh stuff for the best aroma
- Powdered sugar: Whisked until smooth creates that perfect drippy glaze that finishes everything beautifully
Tired of Takeout? 🥡
Get 10 meals you can make faster than delivery arrives. Seriously.
One email. No spam. Unsubscribe anytime.
Instructions
- Wake up the yeast:
- Combine your lukewarm milk and yeast in a small bowl, then walk away for about 5 minutes until you see a frothy layer on top. This tells you the yeast is alive and ready to work.
- Mix the dough:
- Whisk flour, sugar, and salt in your biggest bowl, then make a well in the center. Pour in the melted butter, crack in your egg, and add that happy yeast mixture. Stir until everything comes together into a shaggy ball.
- Knead with love:
- Turn onto a lightly floured surface and knead for 8 to 10 minutes, pushing and folding until the dough feels smooth and elastic, bouncing back when you poke it. Place in a greased bowl, cover, and find a warm corner for it to rise until doubled, about an hour.
- Roll it out:
- Punch down gently and roll into a 16x12 inch rectangle. The dough should be about 1/4 inch thick, like a nice canvas for all that cinnamon sugar goodness.
- Layer the magic:
- Spread softened butter everywhere, then mix brown sugar and cinnamon and shower it over the dough. Press gently so the filling sticks, leaving just a tiny border at the edges.
- Create the spiral:
- Starting from the long side, roll that dough up tight like a sleeping bag. Use dental floss or a serrated knife to slice into 12 equal pieces, then arrange them in your greased baking dish.
- Second rise:
- Cover and let them puff up for another 30 to 45 minutes. Meanwhile, preheat your oven to 350°F so it's ready when these beauties have doubled again.
- Bake to golden:
- Bake for 22 to 25 minutes until they're golden brown and you can smell cinnamon throughout the house. Let them cool slightly while you make the glaze.
- Finish with sweetness:
- Whisk powdered sugar, milk, and vanilla until smooth, then drizzle over the warm rolls. Serve immediately and watch everyone's eyes light up.
 Save to Pinterest
 My sister called me mid-bite during her visit last month, asking if I could teach her how to make these for her new daughter someday. That's when I knew these weren't just rolls anymore, they were becoming part of our story.
Making Ahead
You can assemble these rolls the night before, cover tightly, and refrigerate. Let them come to room temperature and do their final rise while your oven preheats in the morning. Fresh baked cinnamon rolls without the morning chaos.
Filling Variations
I've added chopped pecans and a splash of maple syrup to the filling, which transforms these into something that tastes like a cozy breakfast at a bed and breakfast. Raisins work beautifully too, and my friend swears by adding fresh apple slices in the fall.
Storage Wisdom
Leftovers keep well at room temperature for two days, though they rarely last that long in my house. For longer storage, wrap individually and freeze, then reheat in the microwave for about 20 seconds.
- Place a piece of bread in the container with stored rolls to keep them soft longer
- Reheat in a low oven at 300°F for 10 minutes to restore that freshly baked texture
- The glaze can be made ahead and stored in the fridge, just whisk again before drizzling
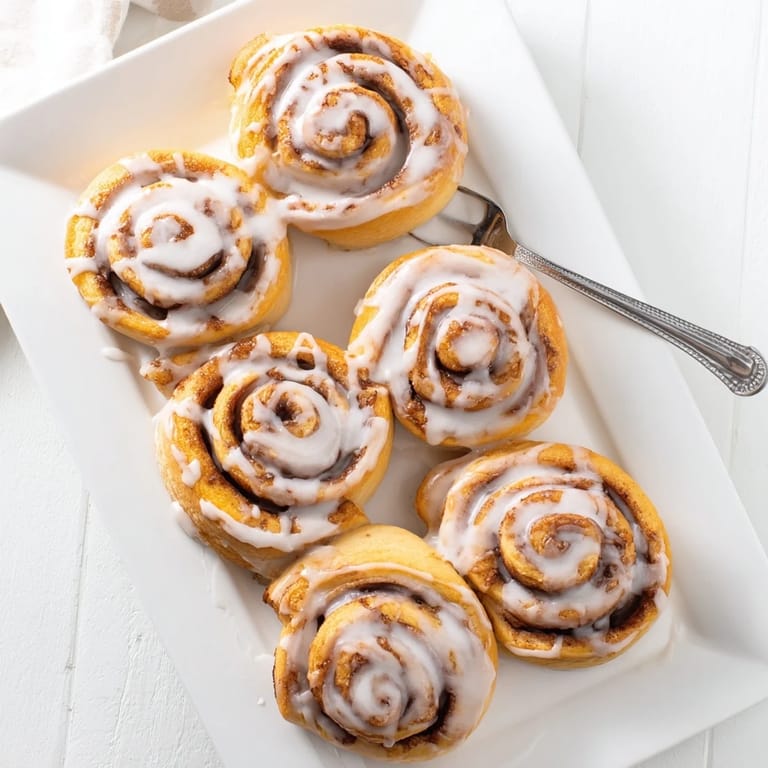
 Save to Pinterest
 There's something deeply satisfying about pulling these from the oven, watching the steam rise off those golden spirals, and knowing you created something that brings so much joy. Happy baking, friend.
Recipe Questions & Answers
- → How do I know when the dough has risen enough?
The dough is ready when it has doubled in size. Gently press two fingers into the dough—if the indentation remains and doesn't spring back, it has proofed properly. This typically takes about 1 hour in a warm, draft-free spot.
- → Can I prepare these the night before?
Absolutely. After slicing the rolls and placing them in the baking dish, cover tightly and refrigerate overnight. In the morning, let them sit at room temperature for 30-45 minutes while the oven preheats, then bake as directed.
- → What's the best way to slice clean rolls?
Use unflavored dental floss or a sharp serrated knife. Slide the floss or knife under the log, cross the ends over the top, and pull through gently. This cuts through without squishing the delicate dough.
- → Why did my glaze turn out too thick?
If the glaze is too thick to drizzle, simply add more milk one teaspoon at a time until you reach pouring consistency. Conversely, if it's too runny, whisk in additional powdered sugar until thickened.
- → Can I freeze these rolls?
Bake and cool completely, then wrap tightly in plastic and freeze for up to 2 months. Thaw overnight at room temperature and warm briefly before serving. Alternatively, freeze unbaked rolls after the second rise, then thaw and bake when needed.